
Just another messenger bag {Lining}
08:00Hello lovelies, we're going to go through the lining construction today for my 'Just another messenger bag'
You'll need pieces A, D, E & F in your lining fabric and your 8" zip and your optional keychain.
Some of you have mentioned that you'd like to put a zipper in the top of this bag before the flap. I haven't got time to do you a new tutorial this week but here's a great tutorial at Emmaline bags that I'd recommend for adding a zipped gusset.
Start by taking one of your main pieces, piece A and insert a zipped pocket using yesterday's tutorial. make sure that you position it at least 4cm (1.5") down from the top so you've got space for your seams and top stitching. I think I went down to around 10cm (4") from the top but you can do whichever suits you best.
Now take your piece F patch pocket and fold in half. Stitch around the 3 sides leaving a turning gap. I leave mine between the straight pins.
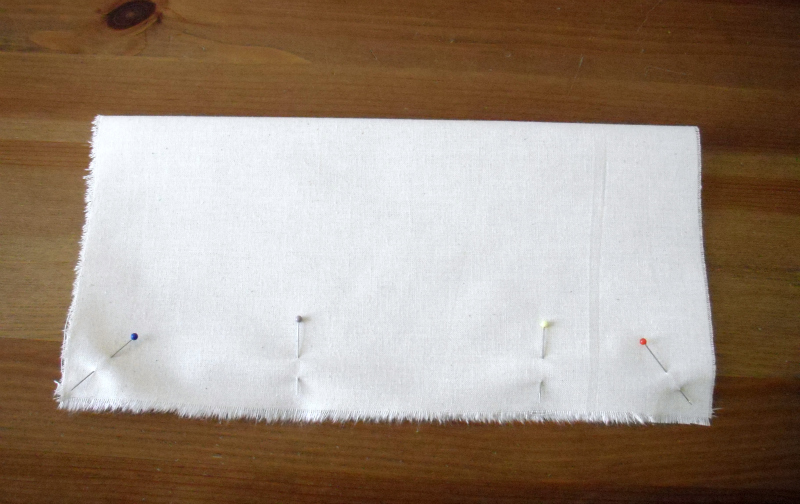
Turn right side out and press well turning the raw edges under.

Lay your pocket piece in the centre of your piece A which doesn't have the zippered pocket on. If you've got fancy labels then you can insert one under one side to be stitched down.

I bought my labels from a seller on eBay who prints them to order with your desired font and wording. They were 50 for £5.99 and you can find them here.

I marked out pockets at 5" and 4.5" with the remainder as a pen pocket with a Frixion heat removeable pen. Then stitched around all three sides and up the divider lines ensuring to backstitch at the start and ends. These pockets might see a lot of use, you don't want them pulling off!


You'll need to leave a fairly sizeable turning gap on one side so I tend to do this on my first side. I put a double pin in either side of the turning gap and leave the centre pin til I've finished stitching this side. Make sure to reinforce your stitching either side of the turning gap as you'll be pulling the whole bag through it at the end.
Repeat for the second main piece A but without the turning gap. Your gusset piece may be slightly too long so you can trim any excess down once both A pieces have been stitched to the gusset.


4 comments
I feel so motivated when I see your posts! Why does it dissipate between the time I leave my laptop til I reach the sewing machine??
ReplyDeleteEnjoying reading along! I never mark my patch pocket dividing lines and always end up with slightly slanted pockets. Maybe one day I'll learn.. :)
ReplyDeleteI like it
ReplyDeleteI like it
ReplyDelete